


- Non-Structural Column Wraps
- Structural Fiberglass Columns
- Cellular PVC
- Decorative Millwork
- T&G | Shiplap Planks
- Premier Shutters
- Outdoor Living
- Ceiling Beams
- Flexible Mouldings
- Interior Ceilings & Walls
- Wainscoting
- Clearance Items
Installing PVC Panel Kits
HOW TO INSTALL ELITE PVC PANEL KITS
Want to print these instructions? Download a PDF version here.
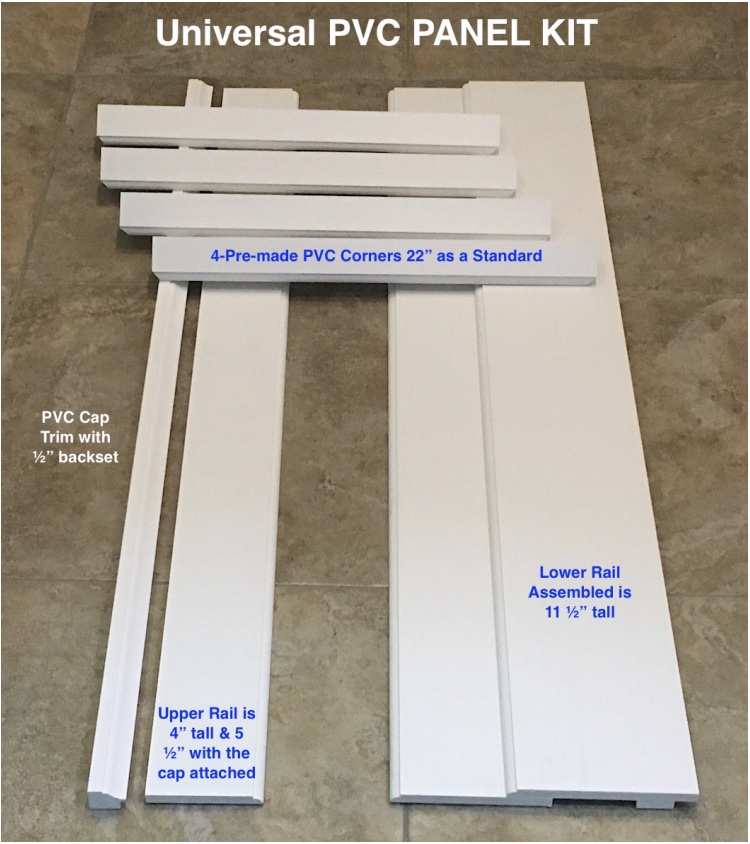
Our Universal PVC panel kits can be installed on columns 6 to 10” square. They can be nailed, pinned or glued to either a wood or PVC column shaft. If applying to Fibreglass columns, just glue in place using construction adhesive. Be sure to use the right adhesive to suit the application. All the trims that run horizontally are shipped in 4’ lengths. They are to be cut down on site. Important note: Do not assume that your shaft is square, measure each side before cutting.
Be sure to use the right adhesive to suit the application. We include PVC glue which is meant for PVC to PVC adhesion ONLY. If applying PVC to fibreglass Columns use construction adhesive like PL Premium (not included).
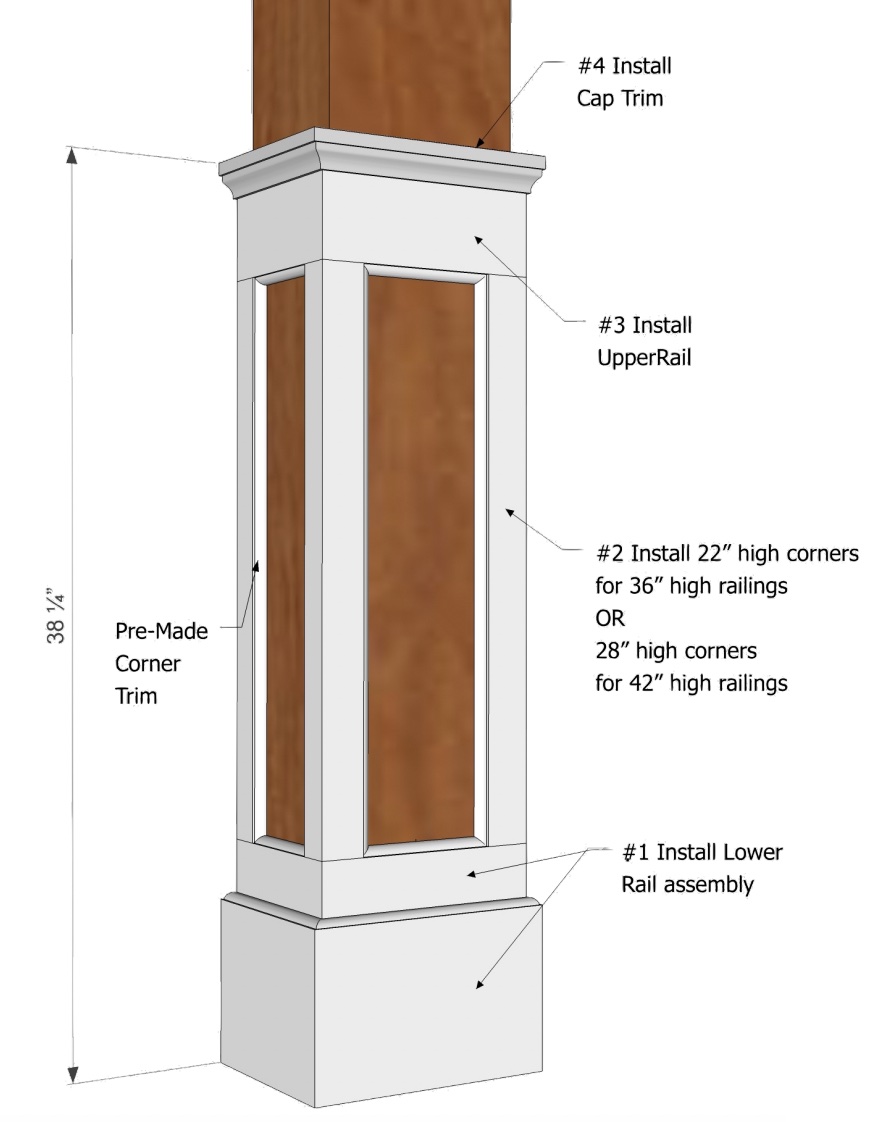
To start: if installing railings, confirm the overall height that you will need and dry fit all the parts to confirm that all the trims will fit.
Step 1: Start working up from the bottom to the top. Cut width and fasten the upper rail to the shaft.
Step 2: Fasten the 4 pre-glued corner trims.
Step 3: Fasten the Upper Rail, be sure to butt up against pre-made corners.
Step 4: Cut and Fasten the Cap Trim.
Step 5: The final finishing touches, fill all gaps with exterior caulking and paint with exterior paint. Preferably 100% acrylic paint. Note: the corners trims are 22” high making the entire panelled section 38 ¼” high to accommodate 36” high Railings. For the optional taller system, the corners trims are 28” high making the entire panelled section 44 ¼” high to accommodate 42” high Railings
Want to print these instructions? Download a PDF version here.