


- Non-Structural Column Wraps
- Structural Fiberglass Columns
- Cellular PVC
- Decorative Millwork
- T&G | Shiplap Planks
- Premier Shutters
- Outdoor Living
- Ceiling Beams
- Flexible Mouldings
- Interior Ceilings & Walls
- Wainscoting
- Clearance Items
Installing Non-Tapered PVC Wraps
Installing Non-Tapered PVC Column Wraps
For Columns Up to 12ft tall
Want to print these instructions? Download a PDF version here.
Thank you for choosing Elite Trimworks for your PVC Column project. We recommend that you, or your contractor, review the following installation tips/suggestions, prior to starting the installation. Please note these tips should be used on wraps that are up to 12” wide, and up to 12ft tall. Please reference the Installation Tips for LARGE PVC Wraps should your columns be wider/taller.
1. Measure the height of where the column is to be installed. Reduce this measurement by about 1" and then cut the column panels (Cut before assembling the shaft).
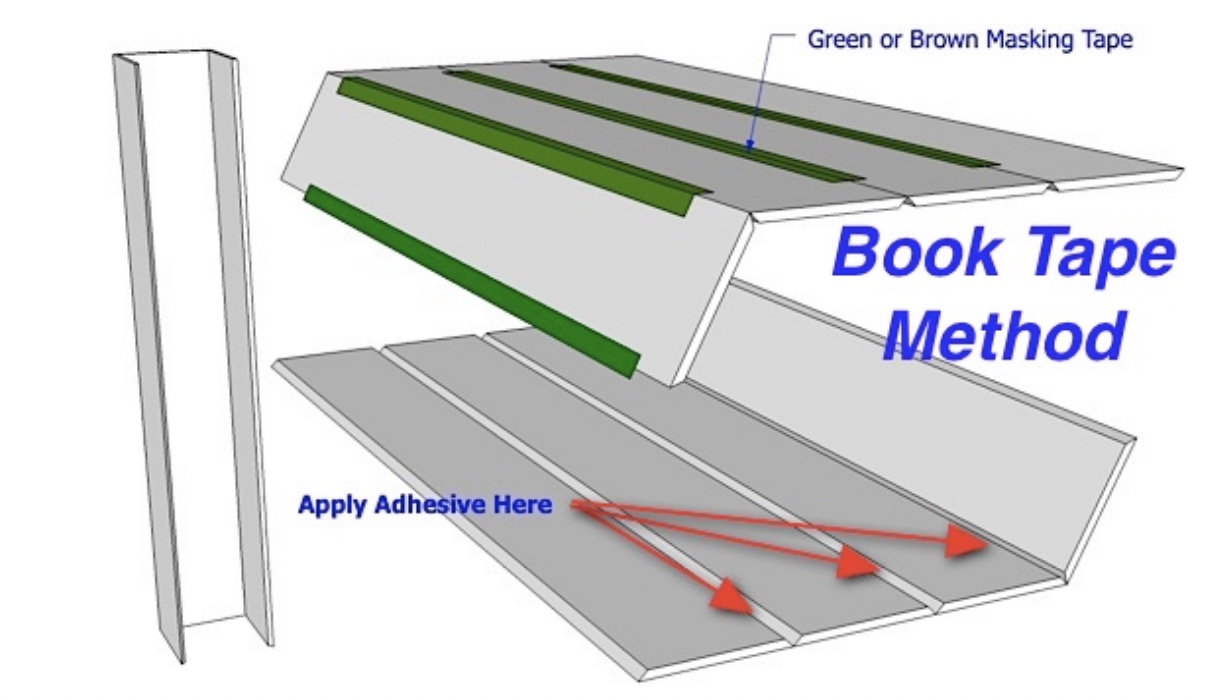
2. Tape three-column panels together as shown, and make sure that the lock mitre edges line up with each other. Next, flip them over, apply adhesive to the 90 degree/lock mitre joints, and fold them into a “ U” shape. This is called the "book tape method”, which makes a very tight seal and results in a strong bond.
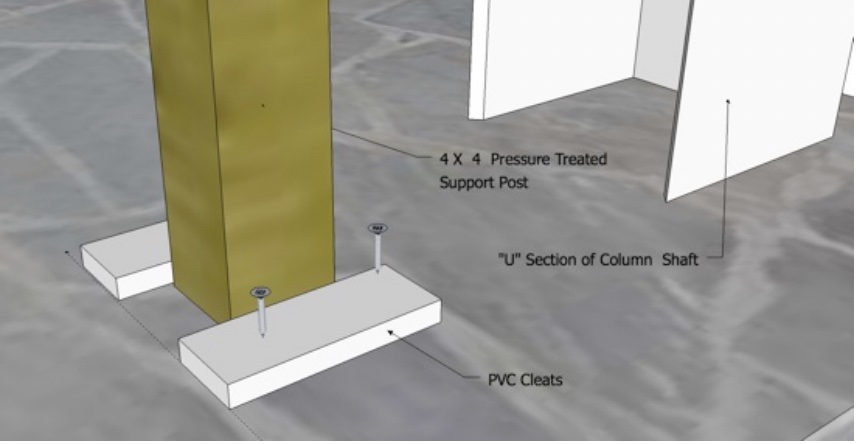
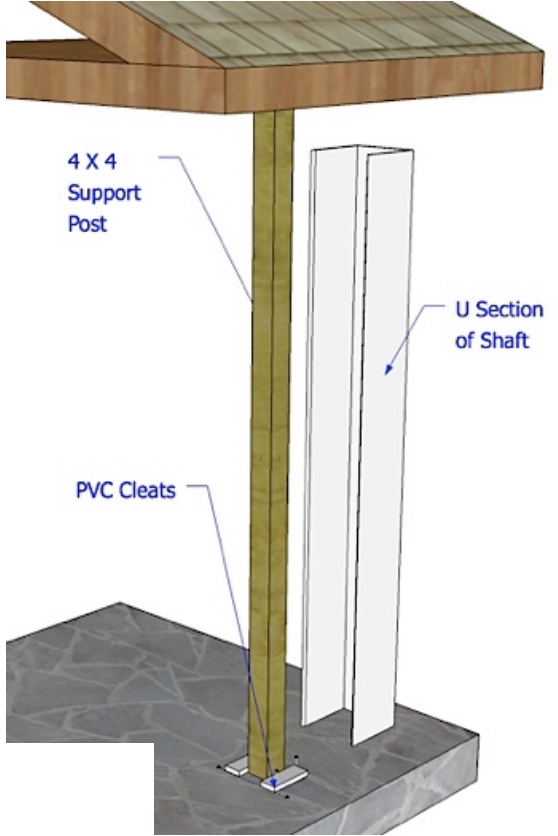
3. Build a support frame / blocking around your existing support post, about ½” smaller than the INSIDE of your column shaft. You can use shims to do the fine adjustments to perfectly position your column. Use a level to make sure that the panels are square, before fastening in place. Using the Tapcon screws (provided), screw the PVC cleats (provided) into the floor/concrete. For the top section, use Pressure Treated Lumber for the blocking.
4. Place the partially built shaft in the desired position and level (plumb). Add shims between your framing/ blocking and the wrap to secure, then drive screws (not provided; we recommend using coarse threaded screws that are corrosion-resistant), from the outside of the shaft into the frame. Ideally, drive the screws in the portions of the shaft that will later be covered by the capital and the base trims.
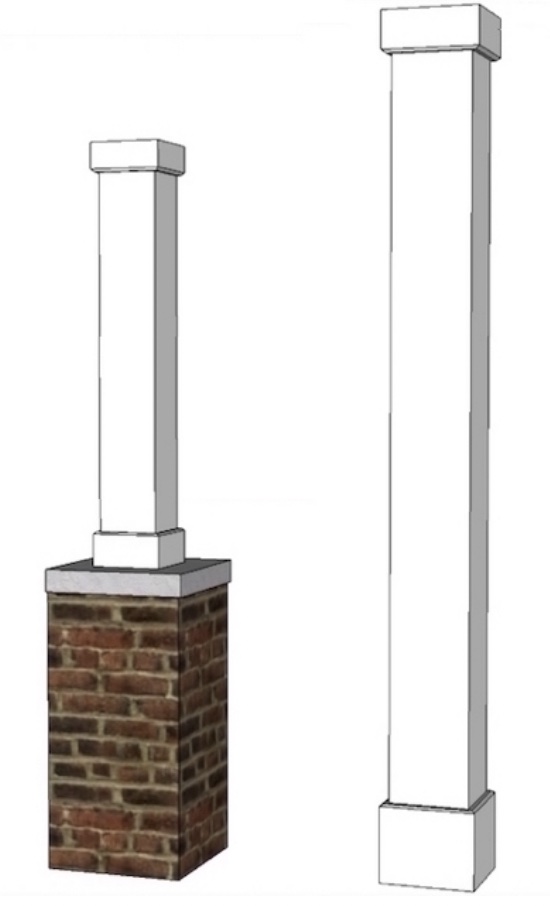
5. You are now ready to glue and tape in the last panel. Drive small screws on the corners of the column for additional strength. Once the glue has set, remove the tape and pin (brad nail), or screw the cap and base in place. In the event that any of the corners open up, lightly sand them down with sandpaper.
6. Fill any imperfections with exterior caulking or speckling; then sand lightly, wipe down/clean, and then you are ready to paint. Painting is not required on PVC but does improve the overall appearance of the column.
TIPS & BEST PRACTICES FOR INSTALLING PVC COLUMN WRAPS
Safety: This is NOT to be intended to be taken as safety advice, see specific safety precautions in the owner’s manual of your power tools.
Handling: We suggest that you use gloves and great care in handling your PVC parts. Unlike wood, edges on PVC can be razor-sharp.
Load-Bearing Capacity: PVC column wraps are purely decorative and have not been tested for load-bearing capacity.
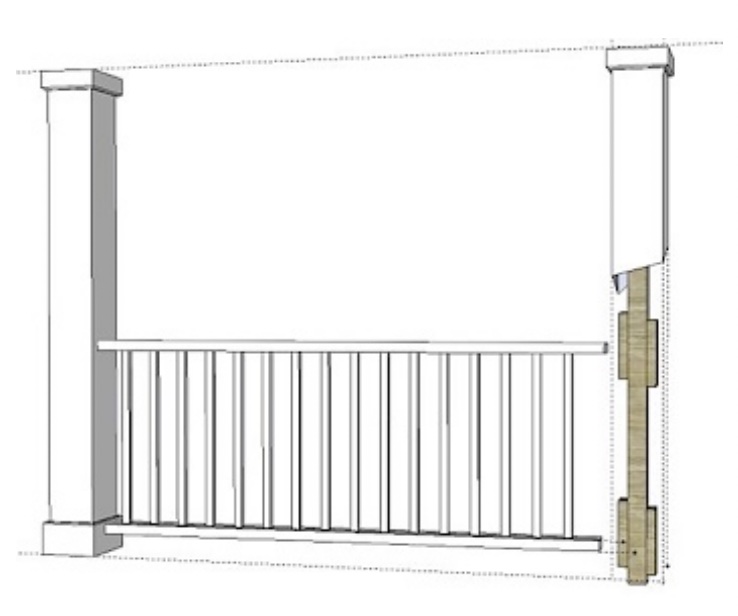
Railings: If there are railings to be installed, insure the rails are secured to the structural support. Use only code-approved methods for installation. Use a metal bracket or pressure-treated lumber the thickness of the space between the support post and the inside of the PVC wrap. Do not use untreated lumber for structural or railing support.
Cutting and Fastening: Cellular PVC can be cut, nailed, and fastened with the same tools as used for wood, with a few differences. Avoid large power framing nailers and pre-drill for any screws larger than 1 ½”. Coarse threaded screws are best.
Cold Temperatures: Cellular PVC becomes brittle the colder it gets. Keep columns indoors prior to installation when working in cold temperatures. Avoid striking the face of the column with a hammer.
Painting: When cellular PVC columns are painted, you can not tell them apart from their wooden counterparts. Cellular PVC does not require painting for protection. Paint lasts much longer when applied to PVC versus adhering to wood due to the absence of internal moisture.
If painting is preferred, follow the following guidelines. Putty any holes using acrylic putty or caulk. Lightly sand or scuff surface of the column. Clean the surface of the column to remove any dirt or oil residue with light detergent and water, or window cleaner. IMPORTANT - Use 100% acrylic exterior paint or acrylic with urethane additive paint with a light reflective value (LRV) equal to or greater than 55 units. Failure to follow this requirement will void our product warranty. Consult Sherwin Williams or Blue River Coating in applications where the paint colour has an LRV value of less than 55 units
Want to print these instructions? Download a PDF version here.