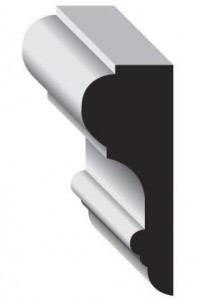
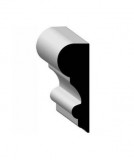
Large Wainscot Chair Rail
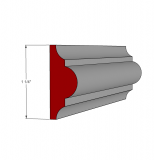
Primed MDF Wainscot Chair Rail Trim, 3 3/16" x 1 ⅛" thick x 14ft.
-
Wainscoting Installation Tips
Find helpful advice on what to order and how much of it to order. Please read through the instructions to see if this is the right wainscoting for you.
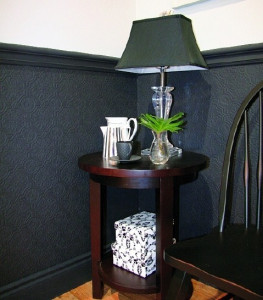
Primed MDF Wainscot Chair Rail Trim, 3 3/16" x 1 ⅛" thick x 14ft. Our most popular chair rail for Appliques wainscoting as a wall treatment or on its own. A perfect match with our appliques trims.
The short length option makes them ideal for shipping via UPS or FedEx nationwide.
Mouldings can not be returned after being cut in half.
-
Moulding CategoryChair Rails
-
Production TimeQuick Ship
-
Inches3 1/2"
-
Tarrif Code4411.93.9010
-
Shipping CostContact us for a quote
Limitations to our Shipping Specials -
Length14ft in two 7ft sections, 14 ft.
RECESSED & SHAKER WALL PANELED WAINSCOTING INSTALLATION
With no panels, the walls are used as panels

How To VIDEO with Step by Step instructions
Samples of Striaght Staircase Installations
Wainscoting on Curved Staircases
Samples of Flexible Wainscot Applications
 Help Choosing Paneled Wainscot |  Wainscoting FAQ |  Painting Wainscoting |
 Around Radiators & Vents |  End Wainscot on Walls |  Beveling Trims Back |
 Compound Miter Settings 45 Degrees 52 Degrees | 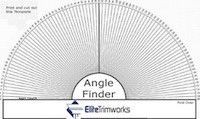 Miter Gauge | 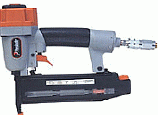 Tool Recommend for Installing Mouldings |
 Tips on Painting Mouldings |  Flexible Mouldings Tips |  Frequently Asked Questions |
Professional Advice on Installing Cornice Mouldings
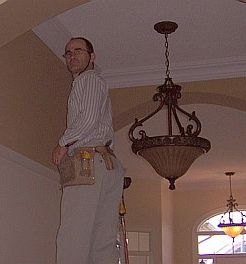 Many people think that cornice is very difficult to install, whereas others think it very simple because they saw the guy on T.V. do it in half an hour. The truth is, with the right tools and a little bit of patience, anyone can install cornices easily. Please be aware that this guide is meant for the first time installer, so some of the terminology and things that come as second nature to professionals will be explained thoroughly. There are many schools of thought when it comes to installing cornice; this guide will teach you the method our installers use. It's not to say that the other methods people use are incorrect, but we find that this method works very well for us.
One of the advantages of MDF mouldings, unlike plaster, is that the walls and furniture do not have to be covered or draped. If your house is under construction, the cutting can be done anywhere. However, if you are living in the house, we ALWAYS cut our wood outside, in the garage. The fine MDF dust would otherwise take days to completely vacuum out.
First we have to look for a large open floor area to cut; normally the garage. Our cornice comes in 12, and 14 foot lengths. Look for an area where you will be able to cut lengths of that size. We look for a spot outside otherwise the MDF dust will get everywhere. All cutting is done on the floor using a Compound Miter Saw with a 10 inch draw. The draw is the distance the saw arm can cut in one pull. Although the cornice comes in various widths up to 7 inches, the width of the cornice increases in direct correlation with the angle of the miter.
Start by measuring the walls that are going to be finished. Measure as accurately as possible down to the closest 16th of an inch. Make sure you note the Inside and Outside Corners. To explain inside and outside corners, imagine a perfect square, if you are standing inside the square, you will only see inside corners. If you walk around the outside of the square all you will see is outside corners.
Before we begin cutting we must determine the correct angle using an Angle Finder. A perfect 90 degree angle should never be assumed, what looks like a 90 degree angle may be off slightly. If the two joining cornices are not a tight fit, the glue will not adhere well. Once the angle is determined use our Cutting Chart to set the compound miter saw in order to get a nice tight corner.
 There is some prep work required, remove anything hanging on the walls, and clear everything approximately 30 inches from the wall in order for the ladders to fit. Your ceiling may have a stucco finish, do not concern yourself; the stucco doesn't need to be removed. Once you start to pin the cornice up on the ceiling you'll find that the stucco breaks off. The little gap that is visible will easily be covered by the paint able latex caulking that will be applied later.
In order to cut you will require a Compound Miter Saw. Using the Angle Finder and our Cutting Chart you should be able to set the Bevel and Miter angles required to make the proper corner. We normally recommend that you make yourself small inside corner and outside corner samples before you begin cutting into the long lengths that will be installed.
This should allow you to visualize what each corner will look like before cutting. Now that we've cut a few pieces, it's time to pin them up in place. We will require a Compressor and a Pneumatic Finishing Nail Gun. The reason for the nail gun is simple, when set properly; the nail gun automatically counter sinks the nail heads about a 1/4 inch into the cornice. This allows for an easier time when finishing (we'll get to that later). We normally have the compressor set to between 98 and 110 psi. Installers, who have never worked with MDF before, should test and adjust the air pressure as needed for their specific equipment. We find that the best fasteners for the job are 15 - 18 gauge brad and pin nails approximately 1 1/2 to 2 inches in length. We apply a pair of nails on both the top and the bottom of the cornice every 12- 16 inches in an "X" pattern. The "X" ensures that even if a joist wasn't caught with a nail the cornice will not fall down because the "X" creates a fastener in the drywall.
The placement of the nail on the face of the cornice plays an important part in the installation. If you look at the back of the cornice, you will notice that there are three flat sides to it. The two small angles are the parts that touch the wall and the ceiling. These two angles run along the entire length of the cornice and these are the two areas you should be aiming for when you begin nailing. You should always try to place the nail gun so that the nail head is hidden into a crease on the face of the cornice. Although the nail head is countersunk, the hole is visible sometimes even after we cover it and sand it, whereas in a crease, it disappears.
All corners should be glued using MDF Glue or MitreBond which can be picked up at any of the large box stores. We don't use either white or yellow wood working glue because both of these glues remain slightly flexible, even when they are fully cured. That means that in time they will allow the MDF. MDF wood fibres to slip a bit. Manufacturers call this "creep". The solution is to use glues that will cure rock hard. Another thing to consider is that MDF is far more fibrous than solid wood and so using water-based glues will cause "swelling" at the joints. Titebond is a very thin solvent based glue which results in a virtually invisible seam.
Making an Invisible Solid Joint Like a Pro
Joints are a little different than corners. Joints happen when you have a straight wall that's longer than the available lengths. There is a process that goes along with it in order for the joint to not come apart.
- If a wall is 16 feet long, we will cut one piece at 5 feet and one piece at 11 feet. Never cut the wall into two halves, people's eyes are always drawn to the middle of the wall and so any imperfections will be visible.
- Do not use a straight cut to join the two pieces. Cut the two ends at 30 degrees to ensure a tight fit and to allow for a larger glue surface.
- Find a block of wood that is approximately 8 inches in length and narrower than the cornice. Glue this piece to the end that is being joined, ensuring half of it is sticking out at the end in order for the next piece of cornice to be joined to it. Nail this piece of wood in from the front of the cornice. By both nailing and gluing, you ensure that this piece will never move.
- Next, install the length with the block attached, to the wall.
- Add a little glue to the face of the block and install the next length just as you normally would. After ensuring a tight fit, add a few nails to ensure the two lengths don't come apart.
Don't Take Chances
All wood, including MDF shrinks a little. To minimize the effect of this shrinkage, which causes unsightly cracks; Elite Trimworks installers use a specially formulated MDF glue, exclusive to us, on all our joints.
This virtually eliminates service repairs due to shrinkage
In addition, to avoid joints in the seams (which may not show up for up to six months, we glue a back brace (see photo) behind ALL our seams. Bracing the back also allows us to make seams disappear.
NOTE: Do not paint the cornice before you install it, you will have to paint it again anyways after all the sanding is done
The Right Glue is Everything
Another thing to consider is that MDF is far more fibrous that solid wood and using water-based glues tends to cause "swelling" at the joints. The solvent base glues do not swell up the joints, allowing a virtually invisible seam. More on using the right glue. After you have completed nailing up all the lengths, we are ready to finish the installation. We use a paint-able latex caulking to caulk the cornice to the ceiling and the wall. Apply a generous amount to all seams, when the caulking dries it tends to sink inwards. Go over the freshly caulked seams with your finger in order to get rid of excess caulking.
Making an Invisible Joint Like a Pro
With a sharp cut and glue, no sanding is necessary!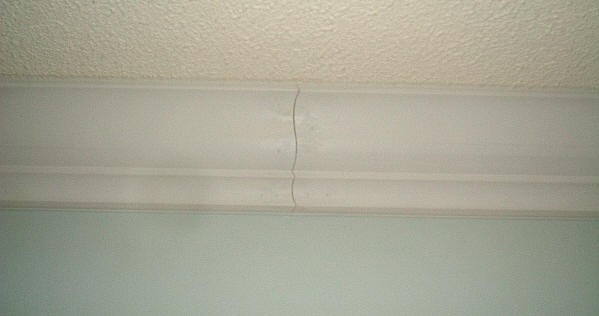
All machinery used to machine wood will become more efficient when used properly. When it comes to making clean glass like cuts, a sharp chop saw blade is in order. As seen in the illustration above, with a sharp cut, there is no sanding required. Seams are truly seamless. Three things contribute to a seamless joint:
- Back bracing the cornice for a tight fit (as described earlier).
- Cut at a 30-degree angle to increase the surface area, 45 degrees would be too sharp of a corner and flake off leaving a gagged edge.
- A sharp blade, our installers sharpen their chop saw blades once or twice week.
With the above three principles employed, simply re-priming the joint is all that is required. Sharpening your tools produces a cut that is not torn out and produces edges that are not burnt or burnished.
A sharp tool provides for a safer worksite and helps to produce a higher quality product. A sharp tool is a common thread that joins every tool used in the wood shop. The best finish is produced with a sharp tool and worst finish is produced using dull tools. Sharp tooling is also much safer. Sharp saws will offer less resistance to operator effort, making it easier to process parts for longer periods of time.
By exploring these concepts further, one only needs to operate a dull chop saw vs. one with a sharp saw to illustrate this point. Assuming the correct saw blade is utilized for both, a dull saw will make smoke, tear edges and corners, cause inaccurate dimensioning, and slow down the feed rate requiring more pressure to make the final cut. A sharp tool is less prone to kickbacks due to the easy cutting and the reduced back pressure created by the cutting edge.
The use of woodworking machinery and its tooling comes with many inherent risks. Every woodworker should always familiarize themselves with company safety policies. There is no way any course can prevent accidents. Only your skills as an operator and the use of safe practices can prevent accidents. Only work on a safe machine, utilize all guards and personal protective equipment, and do not bypass and interlocks engineered for your protection.
Do not use the same caulking to fill in nail holes, corners or joint seams.
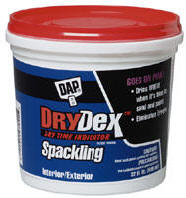
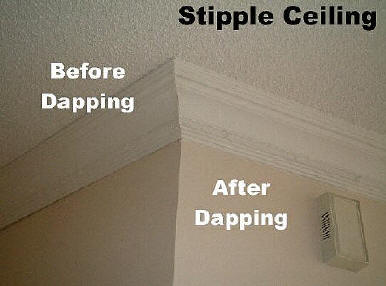
The nail holes, or pin holes, should be sealed and filled with a Spackling Compound. Spackling is a plaster like material that is applied wet and is allowed to dry before being sanded off. It should also be applied generously. A fine (200 grit) sandpaper should be used to sand down the spackling in order to get a smooth finish. The nail holes can easily be filled with a finger and do not need to be sanded. If you use latex dap or caulking for filling in nail holes, you may find that the material will shrink and upon close inspection, will be noticeable.
 |  | 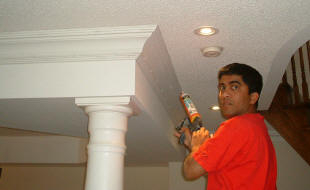 |
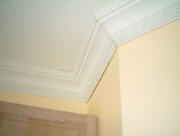
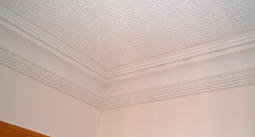
TIP: We suggest you meticulously dap where the crown meets the ceiling and walls. As well as all inside and outside corners and butt joints (where two pieces are joined together).
 |  |
 Now Your Ready to Paint!
Your cornice is now installed and ready to be painted. If you are thinking of painting the house please do yourself a favor and install the cornice first before you paint. Any professional painter will tell you it is easier and faster to paint the cornice before the walls. To achieve a plaster finish, we suggest a flat white or at most an eggshell paint. Flat paints tend to hide imperfections better than a gloss or a semi gloss, which tends to show the brush strokes. Although we have seen cornice painted every color in the rainbow, to recreate the look of plaster which is traditionally a flat white. As a rule of thumb we suggest a glossy or semi gloss paint for baseboards, chair rails, door and window casings and other trim you or the kids can touch. The trims installed lower will need more cleaning than the cornice.


