


- Non-Structural Column Wraps
- Structural Fiberglass Columns
- Cellular PVC
- Decorative Millwork
- T&G | Shiplap Planks
- Premier Shutters
- Outdoor Living
- Ceiling Beams
- Flexible Mouldings
- Interior Ceilings & Walls
- Wainscoting
- Clearance Items
Installing Square Panelled Columns
Installing Square Panelled Columns
Want to print these instructions? Download a PDF version here.
1. Using a pencil, mark the footprint of both the top and bottom where the column shaft is being installed.
2. Use a level to ensure that your markings are plum and the shaft lines up vertically.
3. Install PVC cleats on the floor using the Tapcon Screws provided. They can be installed on the wide or narrow side depending on the space you have to work with.
4. If required: cut the panels to your appropriate height.
5. Tape three column shafts together on the outside face. Ensure that the lock mitre joints are opposing profiles and that the panels are lined up together in width and height.
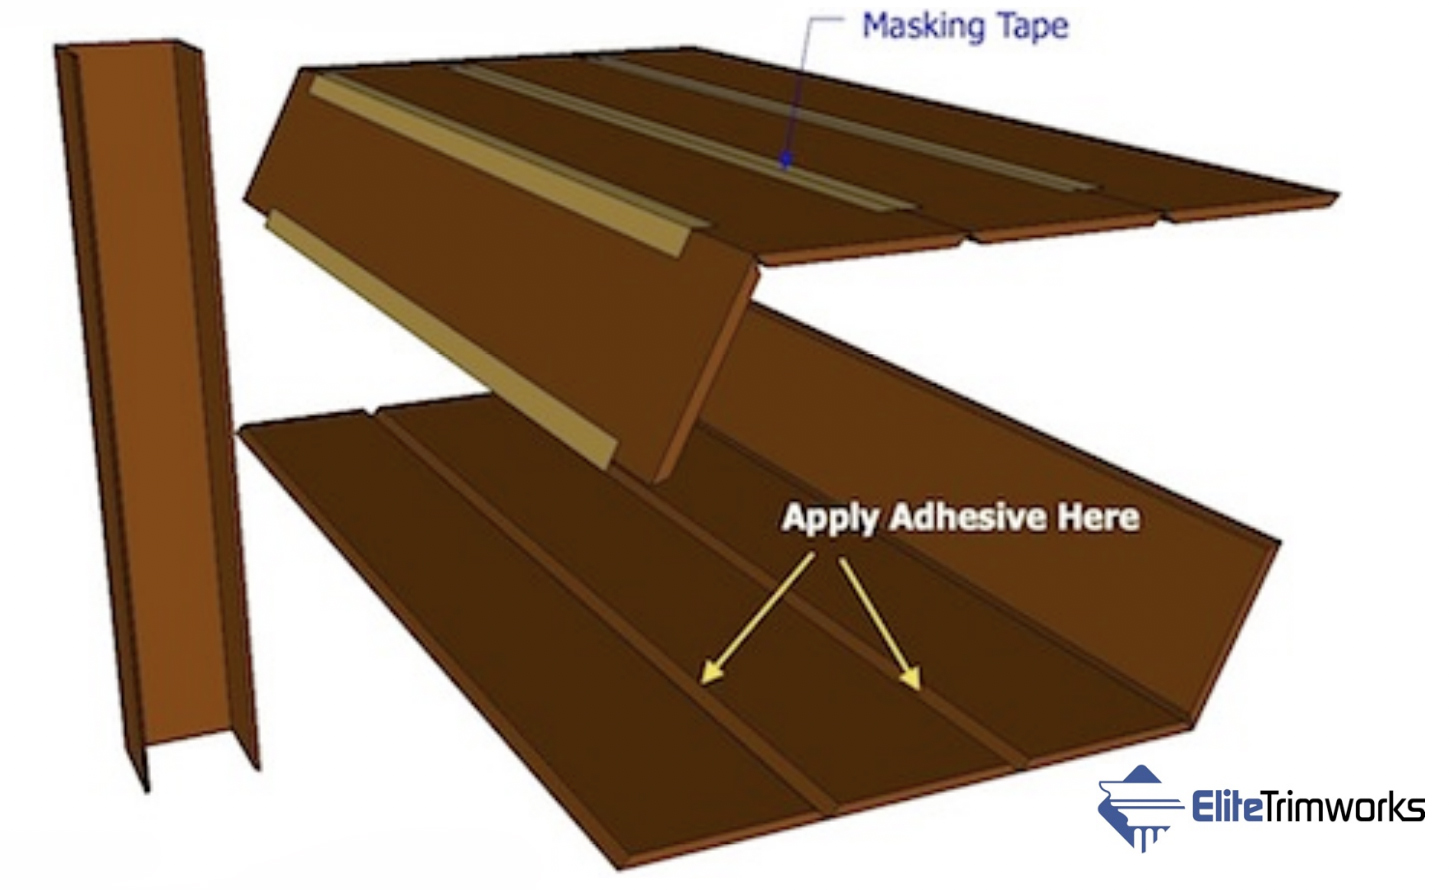
6. Flip the three taped column shafts over and apply the MDF glue to the inside of your folding area. Start with just 3 panels as in the picture.
7. Form the “U” shape by folding the left and right side column shafts perpendicular to the centre column shaft creating a 90-degree angle. Tape in place and allow the glue to set. You may also pin or nail using one small finish nail at the top and the bottom.

8. Stand up column, place over cleats and screw in place.
9. Screw the “L” brackets to the column shaft and then to the ceiling.
10. Install the last panel of the column shaft using the same taping method described above.
11. The instructions for our Recessed, Flat, and Raised Panel columns are all the same. Although both the Recessed and Flat Paneled Column have no physical panels, the Raised Paneled Column does. Those Raised Panels are to be installed after the pre-made corners are placed and BEFORE the Upper rail is installed.
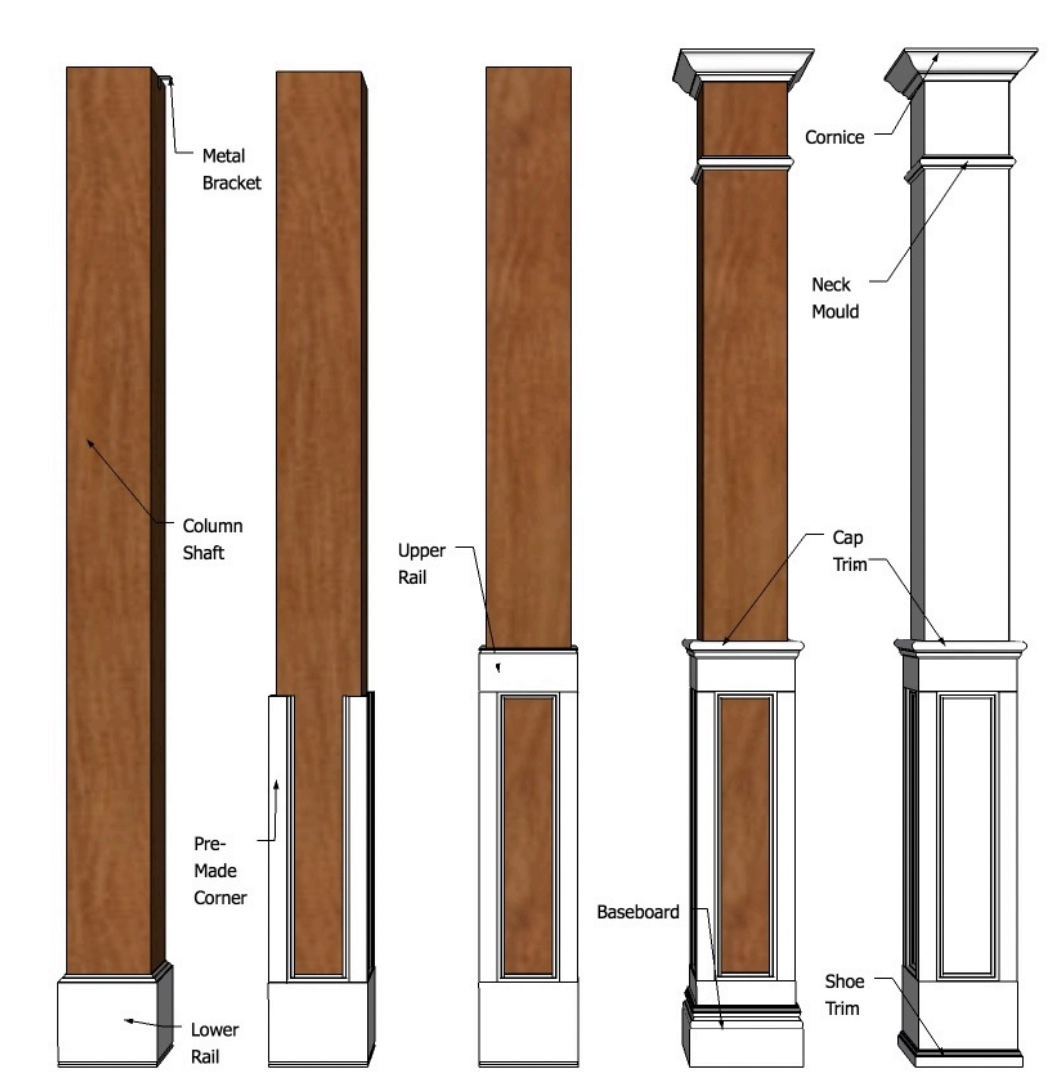
12. Add the trims, in the order shown above by pinning, gluing or nailing the trims onto the shaft. Dap or caulk trim if required.
Note: Our Half Paneled Columns are made to line up and match our wainscoting systems. The columns are shipped with both a shoe trim and a baseboard. To match the wainscoting, use the shoe trim only. As stand-alone, you may use ours or match your existing baseboard. The choice is entirely up to you.
Tip: If you need more height, you can add a spacer under the Lower Rail and then cover it with a baseboard.
Want to print these instructions? Download a PDF version here.